

WIFI CAR

Introducing our latest project: Learn to build a WiFi-controlled RC car from scratch with our step-by-step guide. Drive your car remotely using your smartphone.
You can watch the following video or read the written tutorial below.
Components Required:-
1. Node MCU ESP8266
2. L298n Motor Driver
3. Two Wheeler Chassis
4. Jumper Wires
5. 2x 18650 Battery
6. Battery Holder
Step 1: Gather all the components that I mentioned.
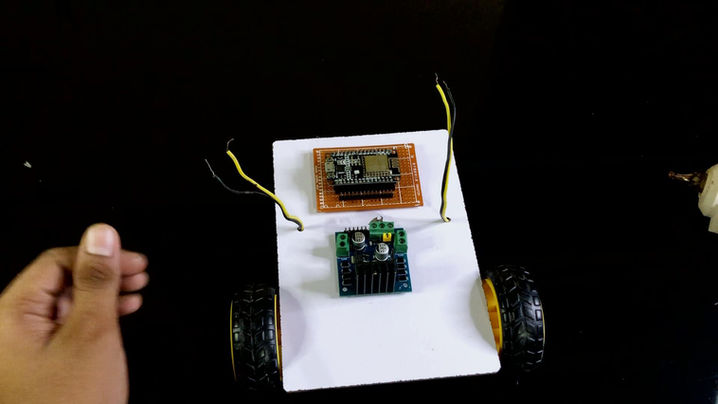
Step 2: Attach all the Components (like Nodemcu, Motor Driver, Batteries etc) on the two-wheeler chassis using a Glue Gun
Like This :
Step 3: Then do the Connections According to the Circuit Diagram(below).

Step 4: Make Sure that the Battery is Connected in a Series Connection and that it Gives 7.4 volts(3.7 + 3.7). Connect the Positive Terminal of the Battery to the 12v terminal of the Motor Driver and Connect the VCC pin of the NodeMCU to the 5v Terminal of the Motor Driver and connect the Negative terminal and the GND pin of the NodeMCU to the GND Terminal of the Motor Driver.
Positive Terminal(Battery) ---- 12V Terminal (Motor Driver)
VCC (NodeMCU) ---- 5V Terminal (Motor Driver)
Negative Terminal(Battery) ---- GND Terminal (Motor Driver)
GND (NodeMCU) ---- GND Terminal (Motor Driver)
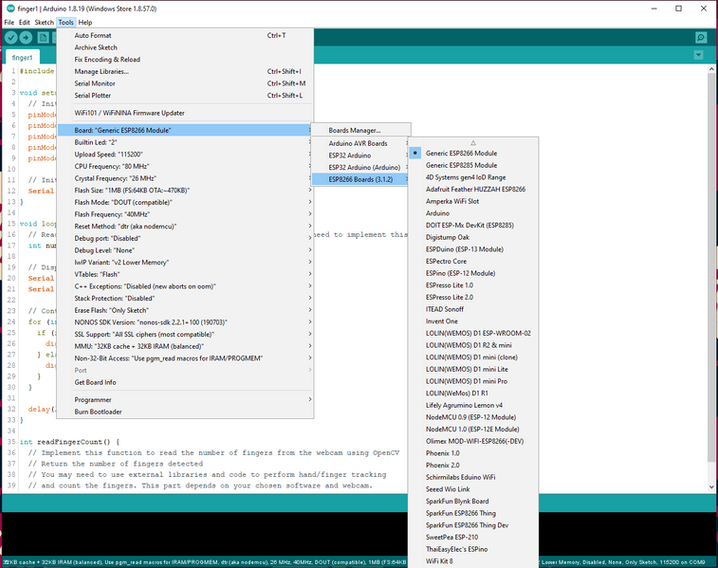
Step 5: Now You Have to Upload a Code to the NodeMCU, Connect your NodeMCU to the PC Through USB Cable.Open the Arduino IDE ,Go to Tool------>Boards------>Generic ESP8266 Module and Select you Com Port that your NodeMCU is Connected
Step 6: Now Finally Upload the Code
CODE - (Click_Here)
Step 7: Now Install the Controller APP in your Android phone
Controller APP - (Click_Here)
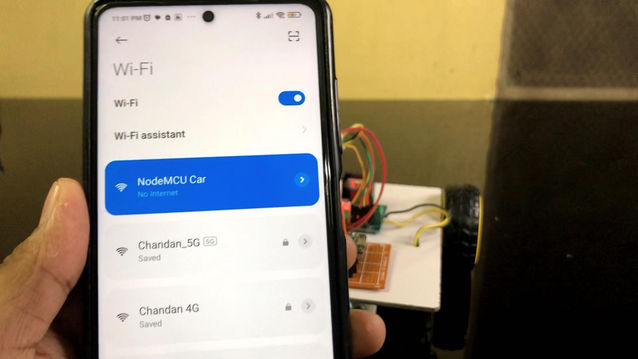
Step 8: Turn ON Your WIFI and You Can see a NodeMCU car will appear ,Click on it to Connect
Step 9: Now Finally It's Done,Just Open the App and Control Your WIFI CAR :)
