Door Sensor Window Changer
![Screenshot 2023-05-15 133508_edited.jpg](https://static.wixstatic.com/media/32023d_61a3f7109fa6471eae37c1a9744ca35f~mv2.jpg/v1/fill/w_732,h_412,al_c,q_80,usm_0.66_1.00_0.01,enc_avif,quality_auto/Screenshot%202023-05-15%20133508_edited.jpg)
Introducing the "Door Sensor Screen Changer" project: Transform your PC with a simple door sensor and Arduino setup. Experience automation like never before! 🚪💻✨ #Automation #Arduino #PCEnhancement
You can watch the following video or read the written tutorial below.
Component Required:-
1. Arduino Uno
2. IR Sensor
3. Jumper Wires
Step-1:- Gather all the components that I have mentioned above.
Step-2:- Connect all the necessary components through jumper wires According to Circuit Diagram
![Add a subheading.png](https://static.wixstatic.com/media/32023d_0e62ab98d65b46a6b7073ec6a2a44318~mv2.png/v1/crop/x_164,y_0,w_1592,h_1080/fill/w_769,h_522,al_c,q_90,usm_0.66_1.00_0.01,enc_avif,quality_auto/Add%20a%20subheading.png)
Step-3:-Now, let's dive into the Arduino code. First Download the Arduino IDE (Link Given Below)
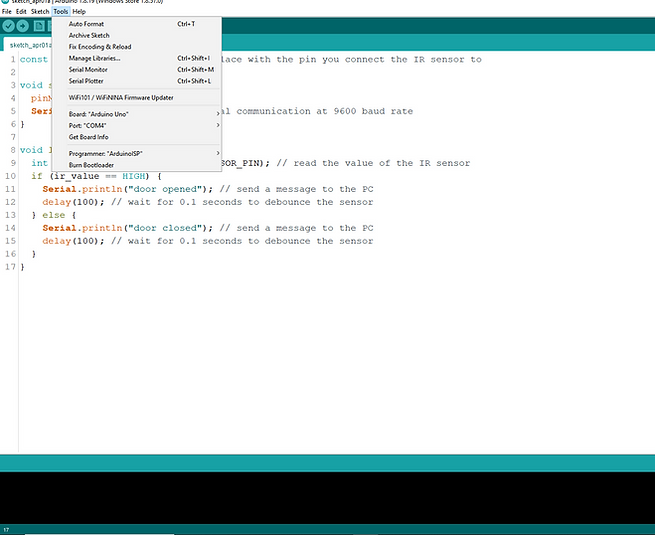
Step-4:- Paste the Arduino code that I have Given Below in the Arduino IDE Make Sure that the board is Selected on Arduino Uno and Check The Port of the Arduino
![Screenshot 2023-05-15 152834_edited.png](https://static.wixstatic.com/media/32023d_56c51581af1b41859a60b5cb447982ad~mv2.png/v1/fill/w_655,h_535,al_c,q_85,usm_0.66_1.00_0.01,enc_avif,quality_auto/Screenshot%202023-05-15%20152834_edited.png)
![](https://static.wixstatic.com/media/9df35518723e4e8496e1a80e5c989496.png/v1/fill/w_44,h_37,al_c,q_85,usm_0.66_1.00_0.01,enc_avif,quality_auto/9df35518723e4e8496e1a80e5c989496.png)
Step-5:- Upload the Code to the Arduino Board
![Screenshot 2023-05-15 153509.png](https://static.wixstatic.com/media/32023d_525cbaa39aee4a57a8b90e50456fd1ab~mv2.png/v1/fill/w_730,h_484,al_c,q_85,usm_0.66_1.00_0.01,enc_avif,quality_auto/Screenshot%202023-05-15%20153509.png)
![](https://static.wixstatic.com/media/9df35518723e4e8496e1a80e5c989496.png/v1/fill/w_103,h_87,al_c,q_85,usm_0.66_1.00_0.01,enc_avif,quality_auto/9df35518723e4e8496e1a80e5c989496.png)
Step-6:- For the PC Code, Download the VS Code (Link Given Below).
Step-7:- Download Python (latest version). Link Give Below
Step-8:- Go to the Extension tab(see the marked arrow)
![Screenshot 2023-05-15 154704.png](https://static.wixstatic.com/media/32023d_a60155e098e6420094f2342f26971942~mv2.png/v1/fill/w_918,h_516,al_c,q_90,usm_0.66_1.00_0.01,enc_avif,quality_auto/Screenshot%202023-05-15%20154704.png)
![](https://static.wixstatic.com/media/9df35518723e4e8496e1a80e5c989496.png/v1/fill/w_82,h_69,al_c,q_85,usm_0.66_1.00_0.01,enc_avif,quality_auto/9df35518723e4e8496e1a80e5c989496.png)
Step-9:- Then Search For Python and install it.
![Screenshot 2023-05-15 155216.png](https://static.wixstatic.com/media/32023d_d6a3228849c84f62b942d26188c6b0be~mv2.png/v1/fill/w_905,h_489,al_c,q_90,usm_0.66_1.00_0.01,enc_avif,quality_auto/Screenshot%202023-05-15%20155216.png)
![](https://static.wixstatic.com/media/9df35518723e4e8496e1a80e5c989496.png/v1/fill/w_149,h_125,al_c,q_85,usm_0.66_1.00_0.01,enc_avif,quality_auto/9df35518723e4e8496e1a80e5c989496.png)
Here is the Python Code -
Step-10:- Install Some important Libraries For this project.
Go to the terminal and Type:-
Command:- pip install serial
Command:- pip install pyserial
​
![Screenshot 2023-05-15 155727.png](https://static.wixstatic.com/media/32023d_a320fbe98d254b08a0e14c0d1b07c6f6~mv2.png/v1/fill/w_795,h_422,al_c,q_85,usm_0.66_1.00_0.01,enc_avif,quality_auto/Screenshot%202023-05-15%20155727.png)
![](https://static.wixstatic.com/media/9df35518723e4e8496e1a80e5c989496.png/v1/fill/w_115,h_97,al_c,q_85,usm_0.66_1.00_0.01,enc_avif,quality_auto/9df35518723e4e8496e1a80e5c989496.png)
this is terminal
Step-11:- Now check in which port your Arduino is connected(In my case its COM4)
​
![Screenshot 2023-05-15 152834_edited.png](https://static.wixstatic.com/media/32023d_56c51581af1b41859a60b5cb447982ad~mv2.png/v1/fill/w_738,h_603,al_c,q_90,usm_0.66_1.00_0.01,enc_avif,quality_auto/Screenshot%202023-05-15%20152834_edited.png)
![](https://static.wixstatic.com/media/9df35518723e4e8496e1a80e5c989496.png/v1/fill/w_70,h_59,al_c,q_85,usm_0.66_1.00_0.01,enc_avif,quality_auto/9df35518723e4e8496e1a80e5c989496.png)
Step-12:- So change your Port(According To Your Port) in the Python Code. For Ex, If You are Connected to COM5 so change this code To COM5
​
![Screenshot 2023-05-15 154704.png](https://static.wixstatic.com/media/32023d_a60155e098e6420094f2342f26971942~mv2.png/v1/crop/x_0,y_0,w_1187,h_691/fill/w_822,h_479,al_c,q_90,usm_0.66_1.00_0.01,enc_avif,quality_auto/Screenshot%202023-05-15%20154704.png)
![](https://static.wixstatic.com/media/9df35518723e4e8496e1a80e5c989496.png/v1/fill/w_101,h_85,al_c,q_85,usm_0.66_1.00_0.01,enc_avif,quality_auto/9df35518723e4e8496e1a80e5c989496.png)
You can Also Change the URl
​
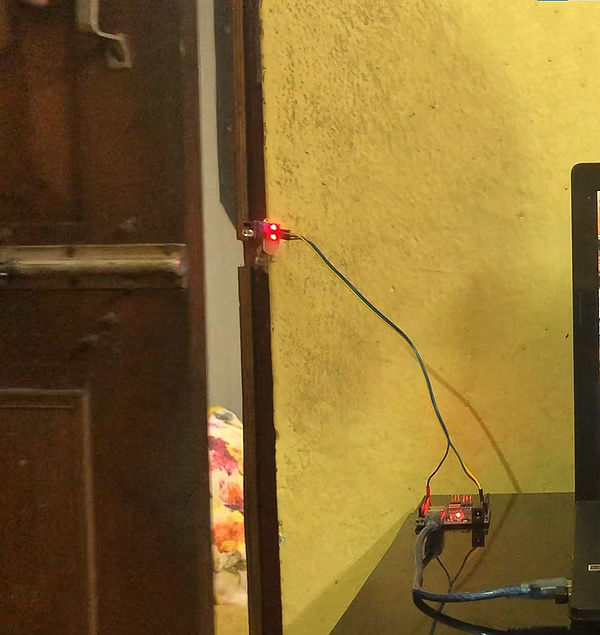
Step-13:- Now it's Almost Done, So Attach the IR Sensor at an angle so that it can detect the moment of the Door. Like this:-
![Screenshot 2023-05-15 133508_edited.jpg](https://static.wixstatic.com/media/32023d_7055327c50e440e694626972e06efcc0~mv2.jpg/v1/fill/w_600,h_635,al_c,q_85,usm_0.66_1.00_0.01,enc_avif,quality_auto/Screenshot%202023-05-15%20133508_edited.jpg)
![](https://static.wixstatic.com/media/9df35518723e4e8496e1a80e5c989496.png/v1/fill/w_104,h_88,al_c,q_85,usm_0.66_1.00_0.01,enc_avif,quality_auto/9df35518723e4e8496e1a80e5c989496.png)
Step-14:- Now It's All Done, So Now Connect the Arduino to your PC And run the Python Code. Now See if it is Working Or Not, If it is not working then Contact me:-